
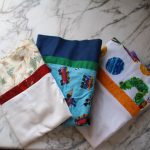
Do you love changing patterns or colors for the different seasons? Then you will love this tutorial to learn how to sew a pillowcase with a contrasting band for any occasion! This is a simple DIY and budget friendly project that can easily change the feel of any space for anytime of the year!

This post contains affiliate links, which means I make a small commission at no extra cost to you. See my full disclosure here.
My Grandma was a sewer and quilter. That means she loved sewing, and had many scraps of fabric to use up once she finished with a project. She came across how to sew a pillowcase with a contrasting band, and started sewing them as personalized gifts with the fabric she had.
Why you will love this pillowcase tutorial
This pillowcase tutorial is great because:
- It is a simple tutorial for beginner sewers. Even if you have just started your sewing journey, this how to sew a pillowcase tutorial is not complicated.
- This pillowcase does not take a lot of fabric. You need just over a yard of fabric for the whole thing, which makes it easy to use fabric you have or buy some new without spending a lot.
- This pillowcase is easy to match with any color scheme or theme. For me personally, I love homemade quilts and I want a pillowcase that can match the fabric and complement the quilt if my pillow is not under the bed. Making this simple and easy DIY pillowcase allows me to have my bedroom look and feel the same.
- It is great for personalized gifts on a budget! Currently, my twin five year olds enjoy the book The Hungry Caterpillar. I can easily make them a pillowcase based on things they enjoy, and you can too with this pillowcase tutorial!
Do you need a pillowcase pattern?
No, this simple DIY how to sew a pillowcase tutorial is simply that. You do not need a pattern.
The only thing you need for this pillowcase for any occasion tutorial is the measurements for the different parts of the pillowcase. These will include the pillowcase body, trim, and cuff/contrasting band.

Does this pillowcase use the Burrito method?
No, this how to sew a pillowcase tutorial for beginners does not use the the Burrito method. The Burrito method when making a pillowcase is where sewers will “roll up” part of the material when sewing the cuff and trim onto the body of the pillowcase.
A benefit of the Burrito method is that you don’t end up with seams on the inside of your pillowcase where the trim and contrasting band are attached to the pillowcase body.
Since this easy pillowcase tutorial does not do the Burrito method, you will have seams on the inside of your pillowcase. Having seams, though, has never been an issue for me and I don’t notice them at all when I am using my pillowcase.
How much fabric do you need for a pillowcase?
Here are the fabric requirements you will need for making a pillowcase, based on the size of pillows you have.

What is the best fabric for pillowcases?
When looking in the fabric store for pillowcase fabric, cotton is the best fabric for sewing your own pillowcases.
Cotton is a natural fiber that is soft, is easy to sew with for any level of sewers, retains color well and easy to wash/dry. It is a very versatile fabric and usually comes in the most prints and patterns. This makes it especially fun for mixing and matching when making your pillowcases for a special someone or occasion!
Supplies you will need
- Fabric (measurements for different pillows above)
- Thread
- Rotary Cutter Set (Cutting Mat, Ruler & Rotary Cutter) *This is the easiest way for me to measure and get all my fabric cut, but you can also use just a Fabric Shears & Ruler.
- Fabric Shears (for trimming thread and/or fabric edges)
- Sewing Machine
Terms To Know
As I am going through the instructions, there may be a few sewing terms I use. If you are new to sewing and unsure of different sewing terms, here are the sewing terms to know.
Right side/Wrong Side – The right side refers to the nicest part of the fabric, and the wrong side refers to the side that generally doesn’t look as nice. If you aren’t sure which side is which (especially solid fabric), don’t worry about it because you won’t be able to tell with the final product either.
Backstitch – You will stitch backwards to reinforce your sewing when you start (the beginning) and when you end so your pieces don’t come apart.
Seam – The line where two pieces of fabric are sewn together.
Pivot – You will change directions for this pillowcase because it makes an “L” shape when you are sewing it together. To pivot, simply lower your needle, lift your presser foot and pivot (turn) to your next sewing position. Lower your presser foot and continue sewing.
There will be two different types of stitches I like to use when making my Pillowcase For All Occassions: the Straight stitch and the Zigzag stitch.
If you are not very comfortable using the zigzag stitch in your sewing, you can use the straight stitch and be just fine to make this pillowcase!

How To Make A Pillowcase Step By Step
Cutting Your Fabric
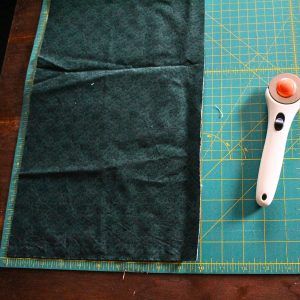
1. Assemble all of the supplies you need, and cut your fabric to the specific lengths in the chart you need for the size of pillow you are making it for.

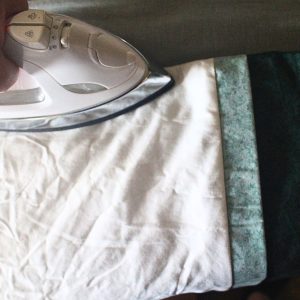
2. With right sides out, fold your trim and contrasting band/cuff in half and press.

Putting It Together
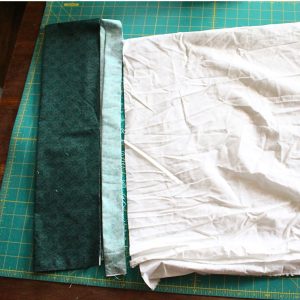
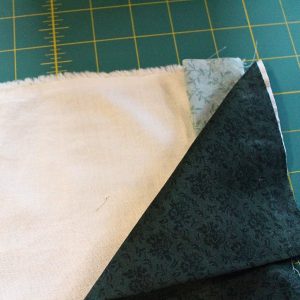
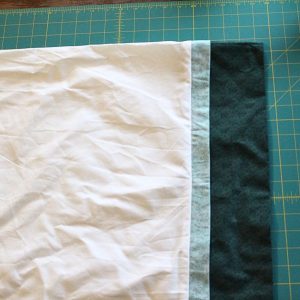
3. Line the edges of your trim to the right side edge of the pillowcase body fabric. (If you have a white pillowcase body and can’t tell the difference between the right side and wrong side, that’s okay!) when you pin, the selvage edges of the trim and pillowcase body will be at the top and bottom.

4. Over the top of the trim, line up your contrasting band. Imagine a sandwich and the trim is in the middle of the sandwich.

If you have slightly varying lengths between three pieces of the pillowcase, you will be okay. Sometimes even if you cut the fabric the full width of the 45″ (or 22 1/2″ when you are cutting it folded), it might be a little off. We will correct this after sewing.
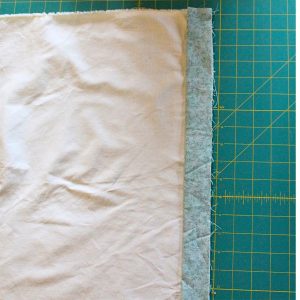
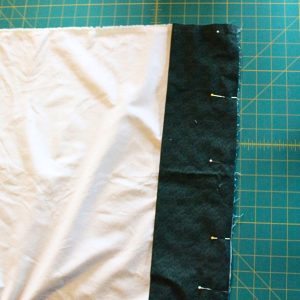
5. Pin all three edges (pillowcase body, trim and contrasting band) together.

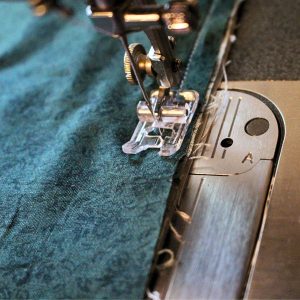
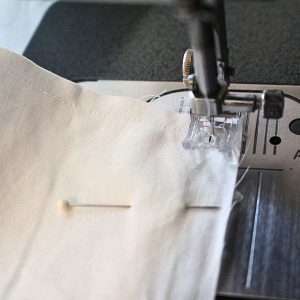
6. Then, sew following your presser foot, or 1/4″ guide.

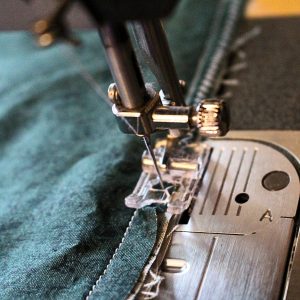
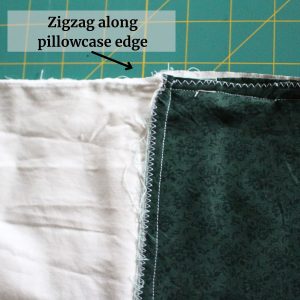
7. Next, zigzag stitch along the edges of the fabric that were just sewn together. This will help prevent any fraying when you are using your pillowcase.

8. When finished sewing, press the trim and contrasting band out, away from the pillowcase body.

At this point, if your three pieces of your pillowcase didn’t all perfectly match before sewing: 1) If you have extra contrasting band or trim, simply cut off the extra with a fabric shears. 2) If the pillowcase body fabric is too long, I would recommend lining it up with a ruler before cutting to make sure everything is even.

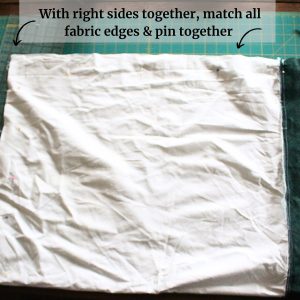
9. Fold the pillowcase body, trim and contrasting band in half with right sides together. Match the all fabric edges and seams together; pin in place. After doing this, you will see the pillowcase starting to take shape.

10. Sew the pillowcase edges together, along your presser foot or 1/4″ guide. Backstitch at the beginning and end, and pivot in the corner.

11. Next, zigzag stitch close to the sewed edge to prevent fraying.

12. Press along the seam.
13. Turn the pillowcase right side out, and make sure you are poke out the pillowcase corners.
14. Press one final time to make sure the pillowcase and seam lay flat.


Let Me Know What You Think
If you try this how to sew a pillowcase tutorial, let me know what you think! If you love your pillowcase, I would love if you left a comment to let me know how it turned out!
How To Sew A Pillowcase For Any Occasion
Equipment
- Rotary Cutter Set (Cutting Mat, Ruler & Rotary Cutter)
- OR Fabric Shears & Ruler to measure
- Fabric Shears
- Sewing Machine
Materials
- 25 inches 45 width cotton/cotton blend fabric for a standard pillow usually this is white or a solid color
- 10 inches 45 width cotton/cotton blend fabric
- 3 inches 45 width cotton/cotton blend fabric
- 1 Spool of thread
Instructions
- Assemble all of the supplies needed and cut fabric to the specific lengths needed for the size of pillow you are making it for.
- With right sides out, fold the trim and contrasting band/cuff in half and press.
- Line the edges of the trim to the right side edge of the pillowcase body fabric.
- Over the top of the trim, line up the contrasting band. (The trim is sandwiched in the middle of the pillowcase body and contrasting band).
- Pin all three edges (pillowcase body, trim and contrasting band) together.
- Sew the three pieces together following the presser foot, or 1/4" guide.
- Zigzag stitch along the edge of the fabric edges that were just sewn together. This will help prevent any fraying when are using the pillowcase.
- Press the trim and contrasting band out, away from the pillowcase body. Note: If the trim, contrasting band, or pillowcase body don't all line up evenly, trim it evenly across at this time.
- Fold the pillowcase body, trim and contrasting band in half with right sides together. Match the all fabric edges and seams together; pin in place. Once this step is finished, you can see pillowcase starting to take shape.
- Sew the pillowcase edges together, along the presser foot or 1/4" guide. Backstitch at the beginning and edge; pivot in the corner.
- Zigzag stitch close to the sewed edge to prevent fraying.
- Press along the seam.
- Turn the pillowcase right side out, and make sure to poke out the pillowcase corners.
- Press one final time to make sure the pillowcase and seam lay flat.
Notes
Other Posts You May Like
How To Make A Hooded Towel For Kids Tutorial
Leave a Reply