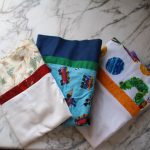
How To Sew A Pillowcase For Any Occasion
This DIY pillowcase tutorial will teach you how to make a pillowcase with a contrasting band for any style, season or for a personalized gift for someone special.
Yield: 1
Equipment
- Rotary Cutter Set (Cutting Mat, Ruler & Rotary Cutter)
- OR Fabric Shears & Ruler to measure
- Fabric Shears
- Sewing Machine
Materials
- 25 inches 45 width cotton/cotton blend fabric for a standard pillow usually this is white or a solid color
- 10 inches 45 width cotton/cotton blend fabric
- 3 inches 45 width cotton/cotton blend fabric
- 1 Spool of thread
Instructions
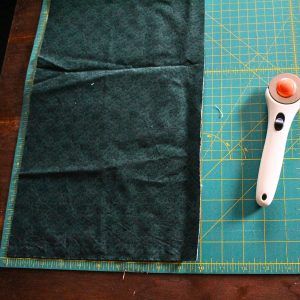
- Assemble all of the supplies needed and cut fabric to the specific lengths needed for the size of pillow you are making it for.
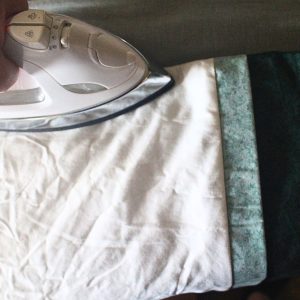
- With right sides out, fold the trim and contrasting band/cuff in half and press.
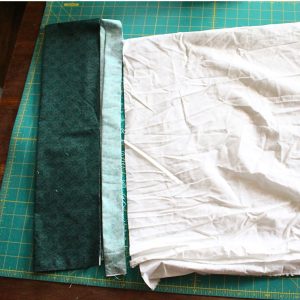
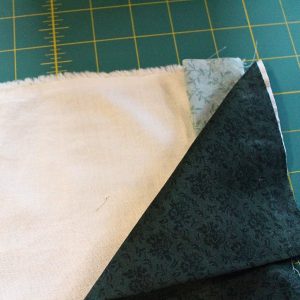
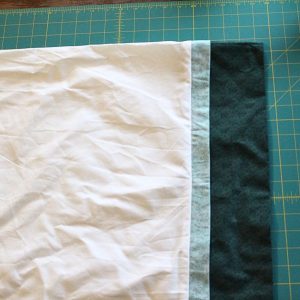
- Line the edges of the trim to the right side edge of the pillowcase body fabric.
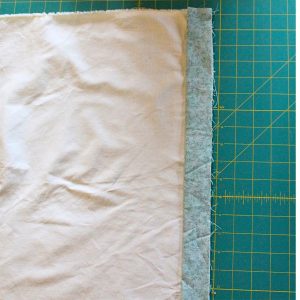
- Over the top of the trim, line up the contrasting band. (The trim is sandwiched in the middle of the pillowcase body and contrasting band).
- Pin all three edges (pillowcase body, trim and contrasting band) together.
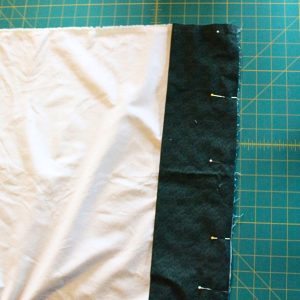
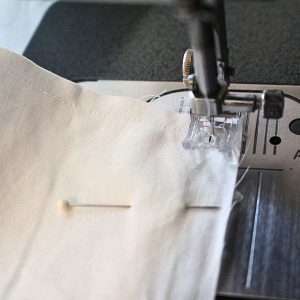
- Sew the three pieces together following the presser foot, or 1/4" guide.
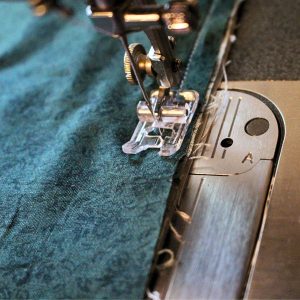
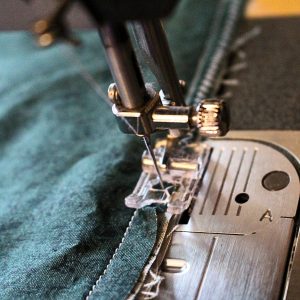
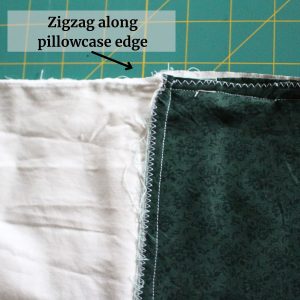
- Zigzag stitch along the edge of the fabric edges that were just sewn together. This will help prevent any fraying when are using the pillowcase.
- Press the trim and contrasting band out, away from the pillowcase body. Note: If the trim, contrasting band, or pillowcase body don't all line up evenly, trim it evenly across at this time.
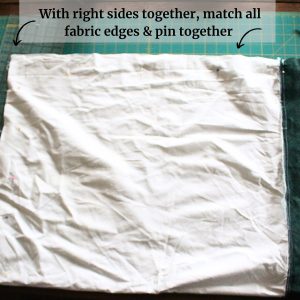
- Fold the pillowcase body, trim and contrasting band in half with right sides together. Match the all fabric edges and seams together; pin in place. Once this step is finished, you can see pillowcase starting to take shape.
- Sew the pillowcase edges together, along the presser foot or 1/4" guide. Backstitch at the beginning and edge; pivot in the corner.
- Zigzag stitch close to the sewed edge to prevent fraying.
- Press along the seam.
- Turn the pillowcase right side out, and make sure to poke out the pillowcase corners.
- Press one final time to make sure the pillowcase and seam lay flat.
Notes
1. For a Queen sized pillow, increase the pillowcase body fabric to 27"; King sized: 33".